🔥 1. O apelo principal

Arduino prototyping is the magic spellbook of modern electronics. It breaks down the invisible barrier between software code sitting on a screen and physical objects moving in the real world. The instant you write a few lines of C++ code, press upload, and see a physical LED light up or a small motor turn on your desk, an intoxicating sense of creative agency takes hold. You realize that everyday technology isn't magic—it is built from accessible, modular blocks that you can orchestrate yourself.
Engaging with microcontrollers fosters a deeply satisfying tactile flow state that balances logical debugging with physical craftsmanship. You will find yourself swapping back and forth between tracing current paths on a solderless breadboard and tweaking code loops to fine-tune system timing. The mental reward is immediate: hardware responds instantly to code changes, giving you tangible proof of your problem-solving. It empowers makers, artists, and tinkers to build custom desk utilities, home automation tools, or interactive art installations out of simple electronic components.
🗺️ 2. O panorama
Before diving into hardware purchases, it helps to understand that the Arduino ecosystem encompasses a spectrum of projects ranging from basic circuit tinkering to complex networked devices. The ecosystem relies on simple microcontrollers, plug-and-play jumper wires, and open-source software libraries that abstract away low-level silicon architecture.
Interactive Gadgets & Automation (Sensors and Tactile Feedback)
Building smart desk utilities, environmental monitors, and interactive displays using basic inputs and outputs. Circuits are built on temporary solderless breadboards for fast, dynamic experimentation without requiring permanent soldering.
Robotics & Mechatronics (Physical Motion and Motor Control)
Integrating servo motors, stepper drives, and motor shields to create moving chassis, robotic arms, and mechanical sculptures. This domain bridges mechanical engineering with software loops to translate digital code into precise kinetic forces.
Connected IoT Devices (Wireless Networking and Cloud Telemetry)
Utilizing Wi-Fi or Bluetooth enabled boards to push physical sensor data to cloud dashboards or remotely control smart home devices. It shifts focus from local hardware interaction to networked communication protocols and web integrations.
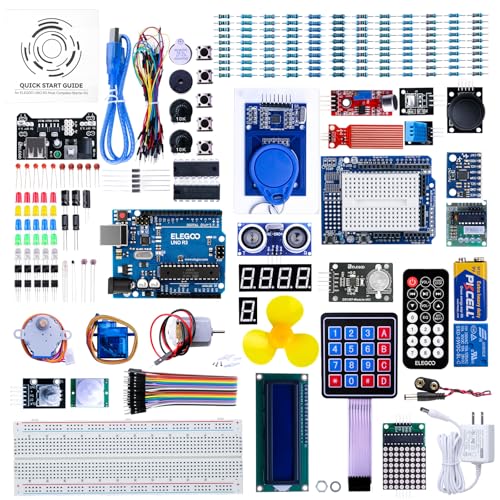
For complete beginners, an Arduino Uno Rev3 Starter Kit with a solderless breadboard and basic component array is universally recommended: it provides a stable, forgiving platform with massive community support that cures analysis paralysis without locking them into a rigid style.
🛒 3. Kit inicial e orçamento
O mínimo necessário para o dia um. Sem gastos desnecessários nem barreiras.


ℹ️ RokkuWare é apoiado pelos leitores. Ao comprar por links, podemos receber uma comissão sem custo adicional para você.